
Lightroom guide
How to Fix Overexposed Photos in Lightroom
Use the histogram and a controlled editing order to recover bright detail without making the entire image gray.
Fix an Overexposed Photo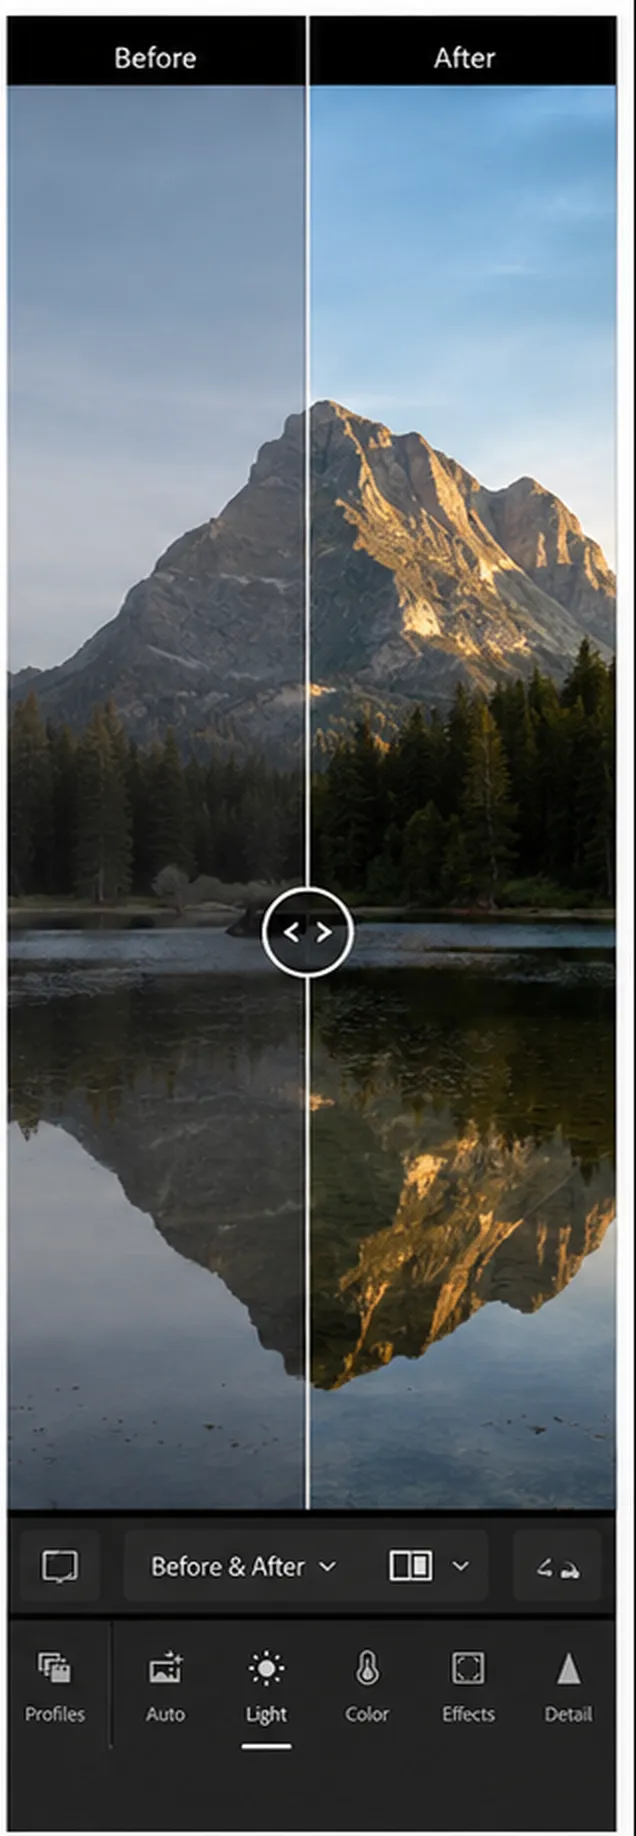
Read the histogram before moving sliders
Separate overall exposure from highlight recovery
Use local masks for sky and subject balance
Check clipping and color after every major adjustment
Quick answer
In Lightroom, lower Exposure until the midtones are close, reduce Highlights and Whites while watching the histogram, then use a Sky or Subject mask when different parts of the frame need different corrections. RAW files provide the most highlight latitude.
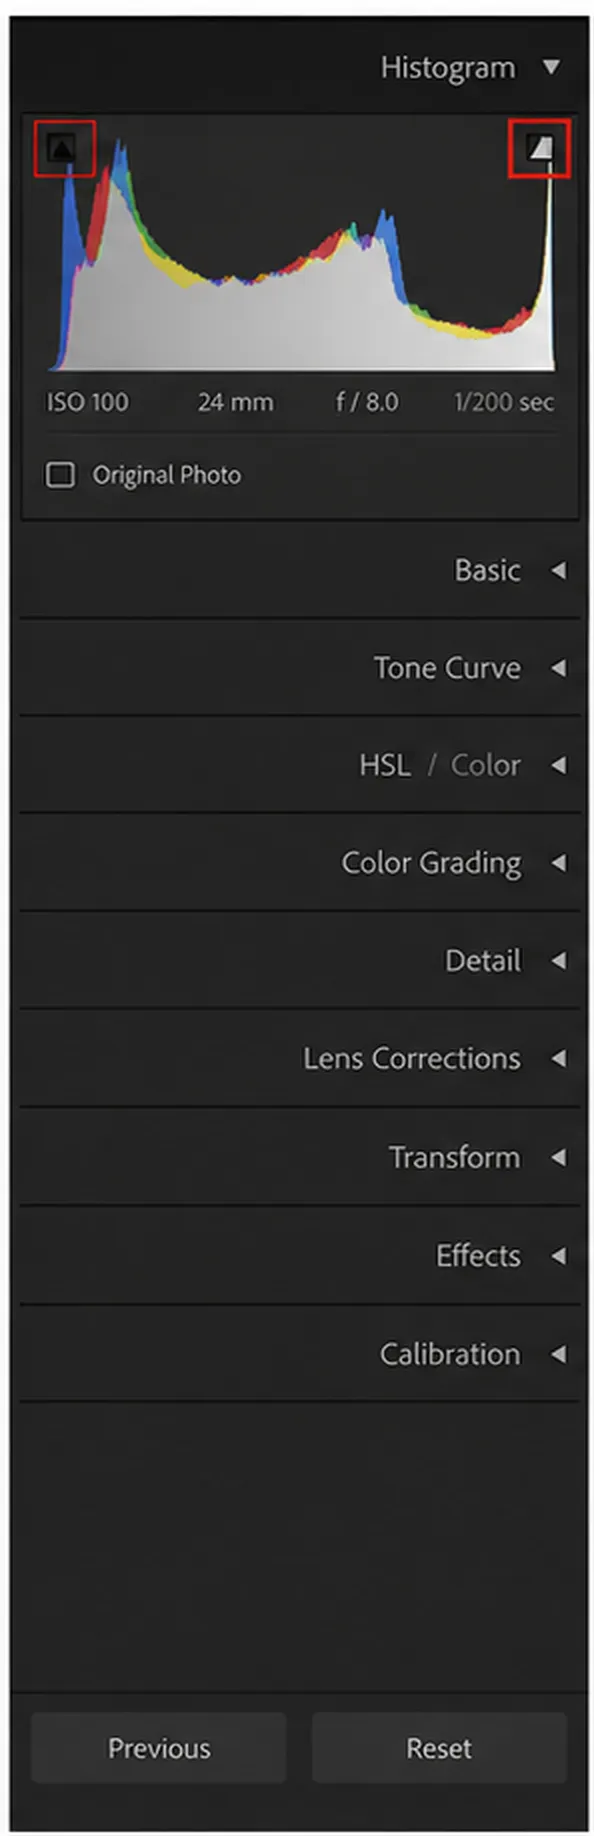
Read highlight clipping in the histogram
Open the Develop or Edit view and inspect the histogram. A heavy stack against the right edge suggests bright clipping. Turn on highlight warnings so clipped areas become easy to locate.
The histogram describes tonal distribution, not artistic quality. Use it alongside the photo and decide which highlights need texture and which may remain naturally bright.
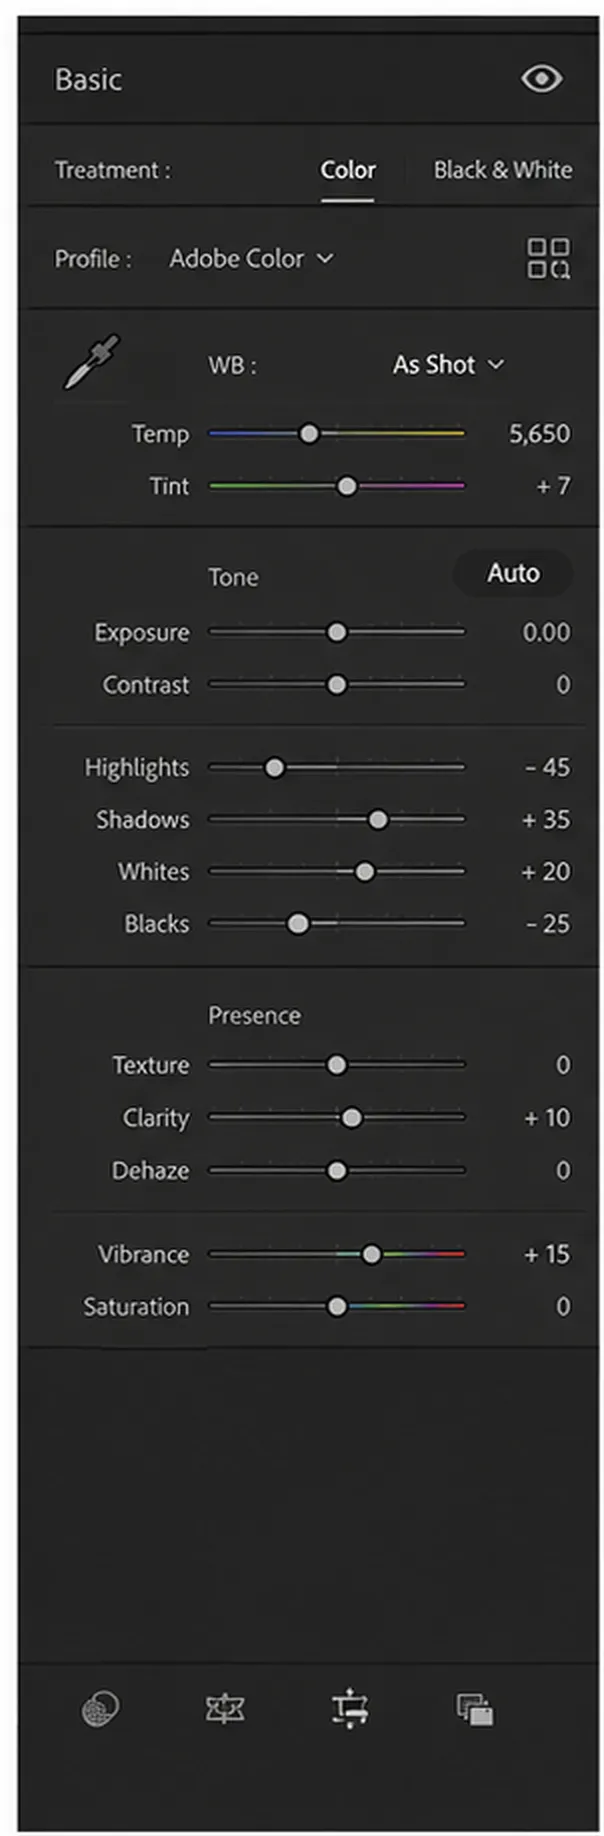
Correct the Basic panel in the right order
Lower Exposure for the overall frame, then reduce Highlights to restore bright texture. Adjust Whites last to set the brightest clean point. Add a small amount of Contrast or Blacks only after the image has stopped looking clipped.
Avoid dragging every bright control fully left. Extreme recovery can produce dull highlights, gray whites, and unnatural color at clipped edges.
- Exposure sets the broad starting point
- Highlights controls bright detail
- Whites sets the upper tonal endpoint
- Contrast and Blacks restore depth after recovery
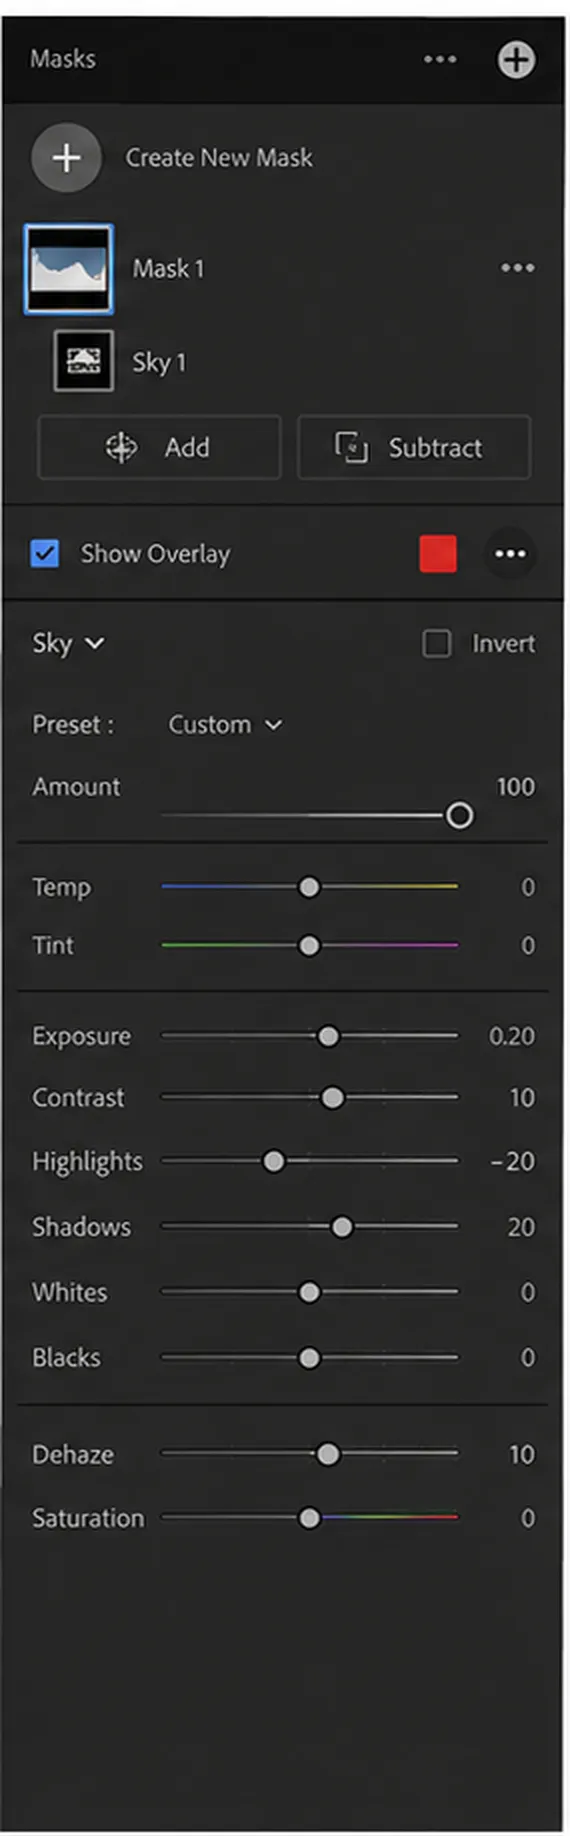
Balance sky and subject with masks
Use Select Sky when the background is too bright but the foreground is already correct. Use Select Subject when a face or object needs a separate lift. Refine mask edges around hair, branches, and architecture.
Local masks should support a believable light direction. A dark stormy sky over a brightly lit subject rarely looks coherent unless the scene actually contained that contrast.
Finish with a subject check
Toggle the before and after view, zoom into important edges, and inspect skin color. If the main subject became too dark during highlight recovery, use a modest subject mask instead of raising global exposure again.
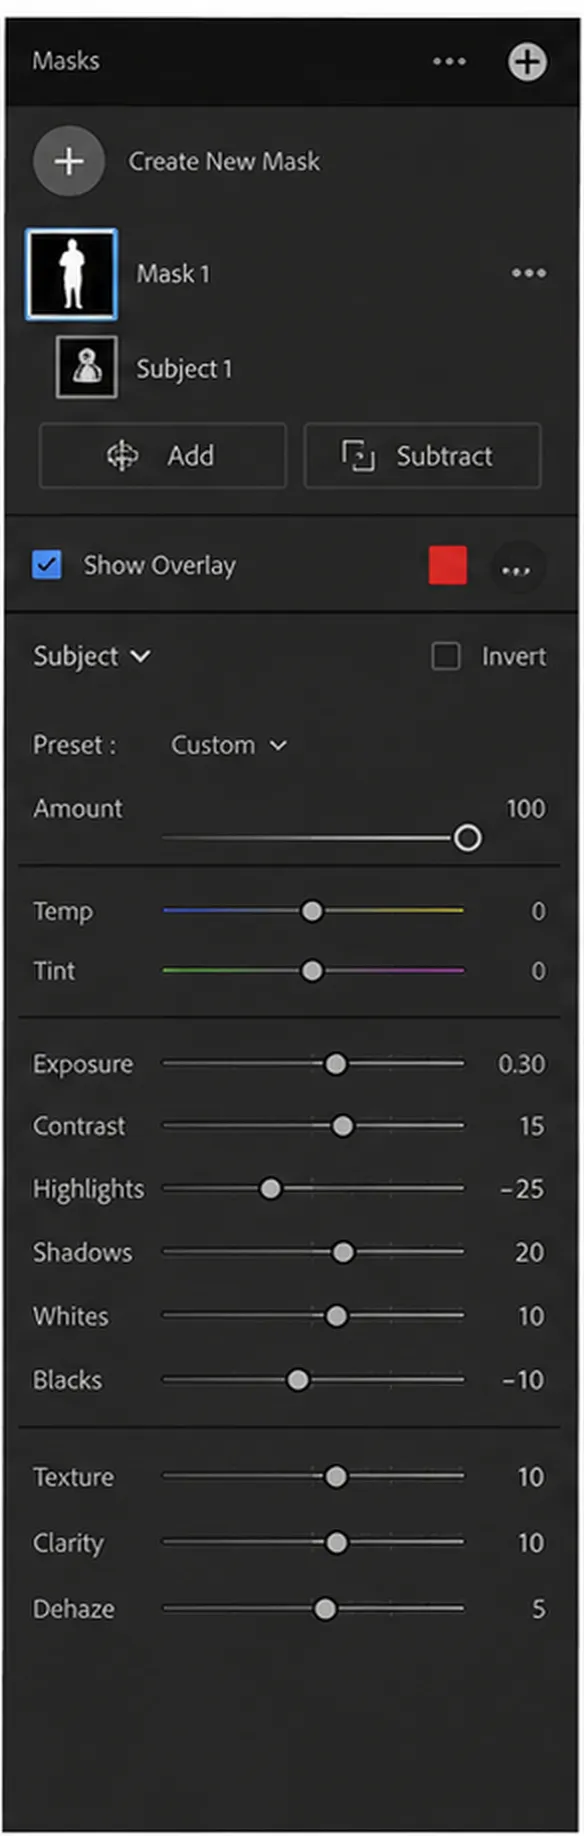
Fix a blown out sky with a Sky mask
When the sky is the only part that needs work, use the Sky mask instead of dragging global Highlights further down. Select Sky, then reduce Exposure and Highlights inside the mask while watching the horizon and any gaps between branches or buildings.
If the sky is already pure white, the mask can reduce glare and blend the edge more naturally, but it cannot recreate clouds the camera never recorded. In that case, accept a calm, evenly bright sky rather than pushing the mask into gray or blue-banded tones.
- Select Sky first when the foreground is already correct
- Reduce Exposure and Highlights inside the mask
- Check the horizon and fine edges for halos
- Leave a fully clipped sky neutral instead of forcing false color
Frequently asked questions
Questions about how to fix overexposed photos in lightroom
Fix excessive brightness in your own photo
Upload the original image, compare the corrected exposure, and keep the version that looks natural.
Upload a Photo