
Photoshop guide
How to Fix Overexposed Photos in Photoshop
Build a non-destructive correction with Camera Raw and adjustment layers, then mask the changes where they are needed.
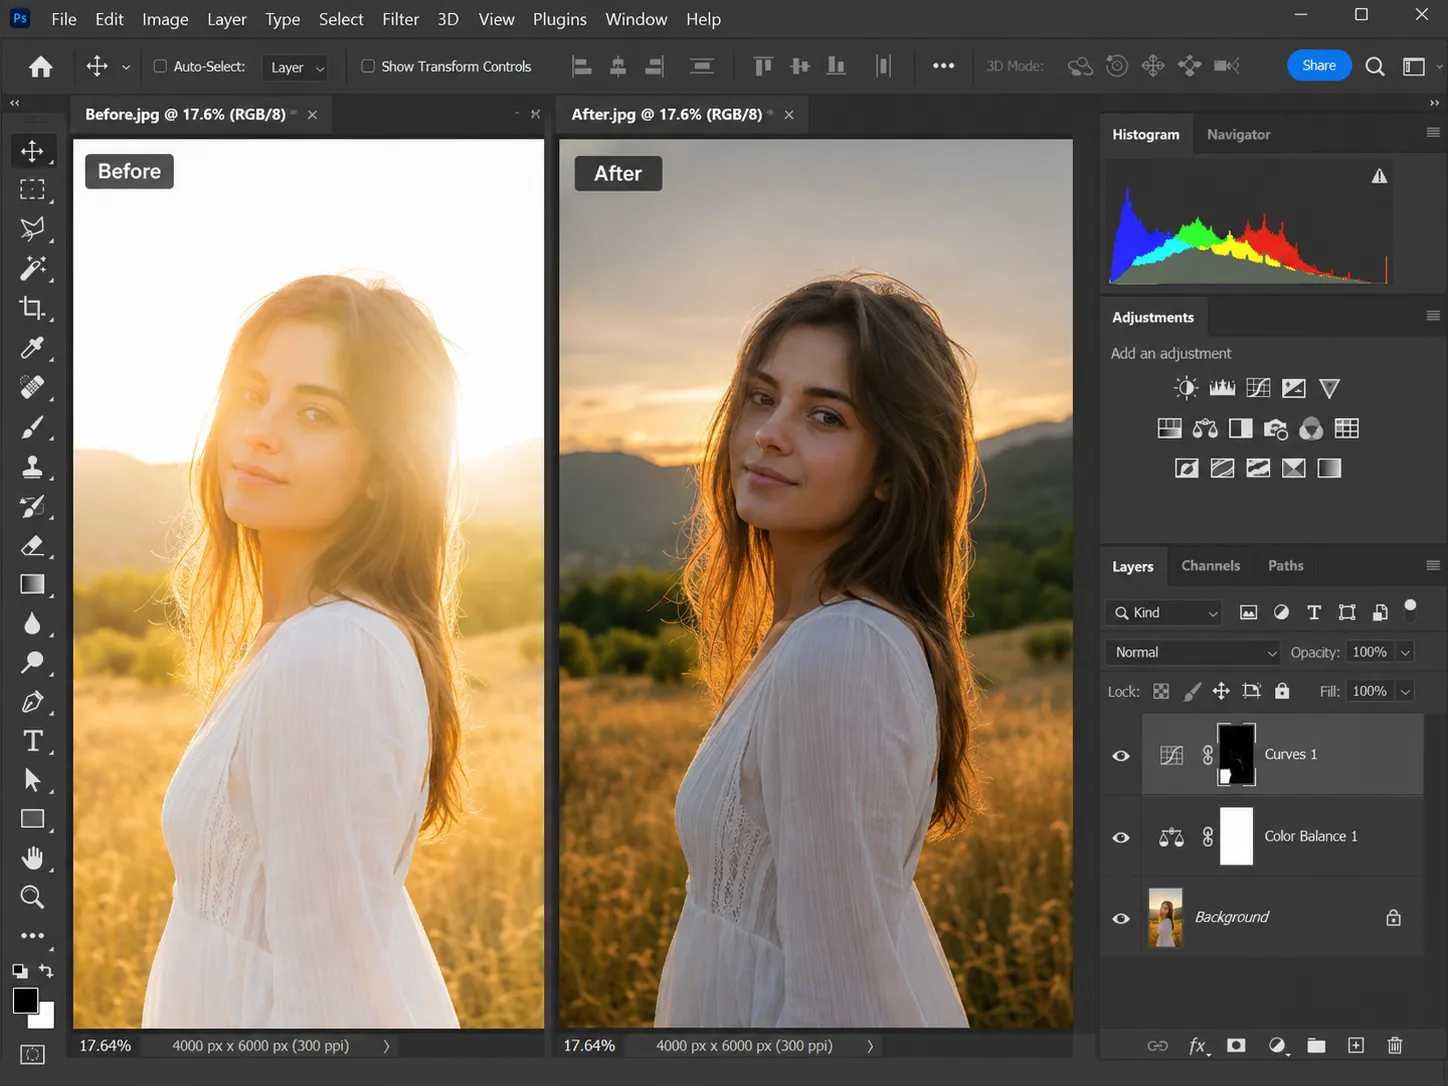
Use Smart Objects and adjustment layers
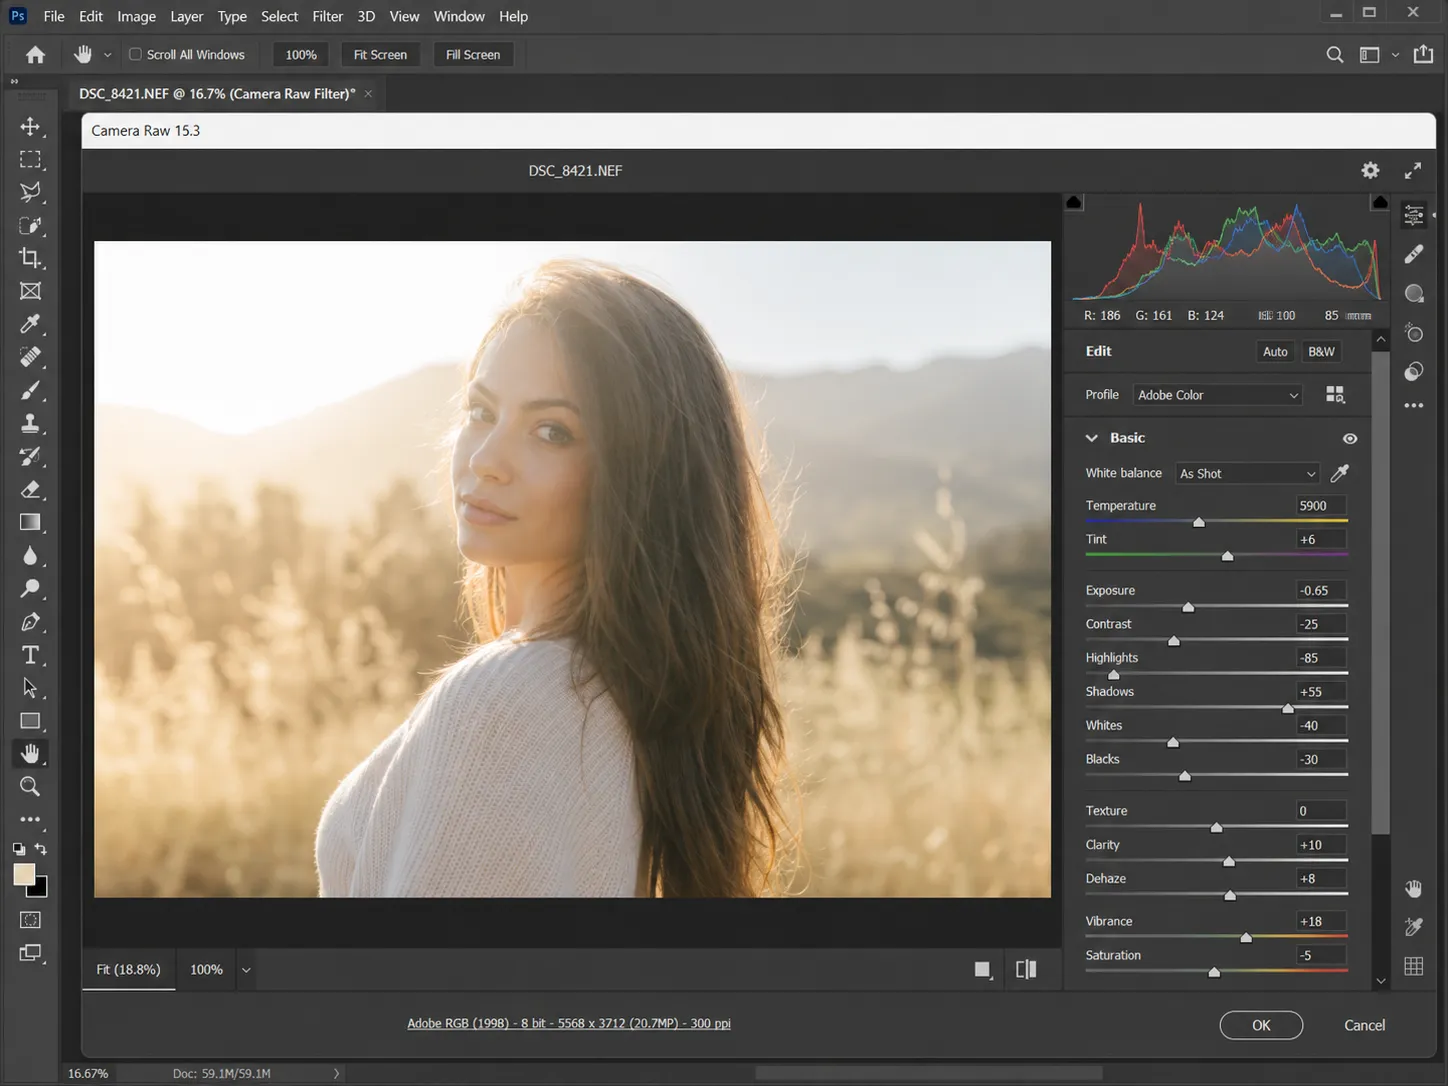
Start broad in Camera Raw
Use Curves or Levels for tonal precision
Restrict local changes with layer masks
Quick answer
Open the image as a Smart Object, use Camera Raw to reduce Exposure, Highlights, and Whites, then refine local areas with Curves or Levels adjustment layers and masks. Keep each correction editable so you can reduce its strength later.
Start with Camera Raw as a Smart Filter
Convert the photo layer to a Smart Object, then open Camera Raw Filter. Lower Exposure for the overall image and reduce Highlights and Whites for the bright range. This creates a broad, reversible base correction.
If the source is RAW, open it directly in Camera Raw and choose Open Object. RAW usually retains more tonal information than JPEG.
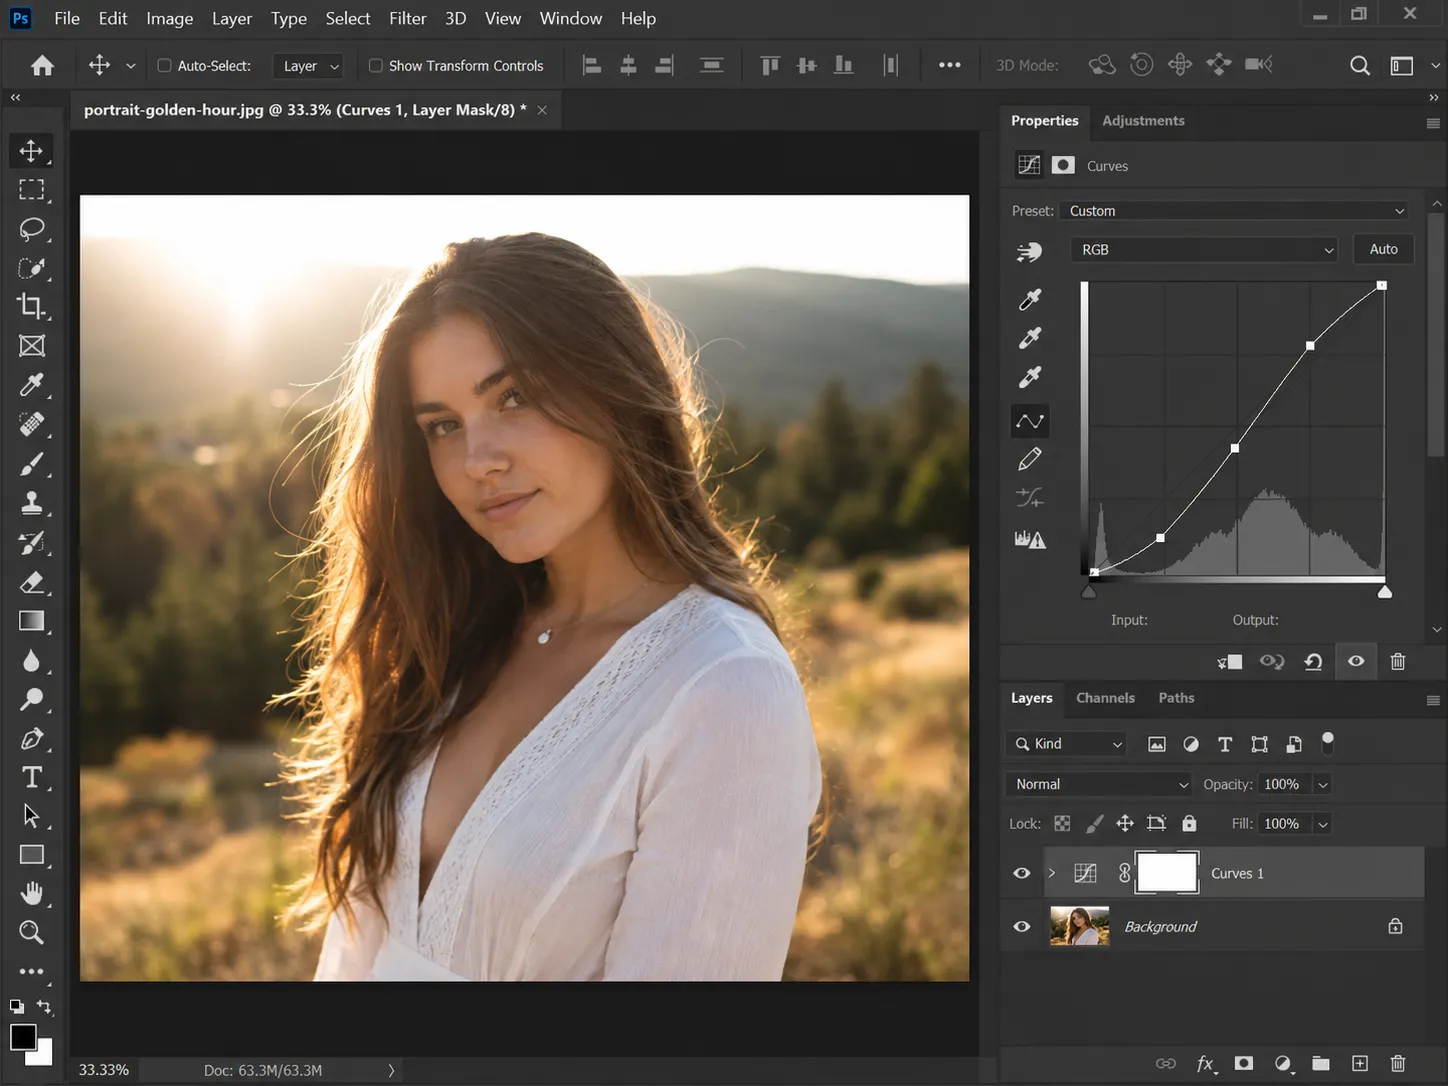
Use Curves for controlled highlight recovery
Add a Curves adjustment layer. Pull the upper-right portion of the curve down gently while anchoring the midtones. This reduces the brightest range without shifting the entire image by the same amount.
Use the layer opacity to reduce the correction if highlights become gray. A smooth curve generally produces cleaner transitions than several sharp points.
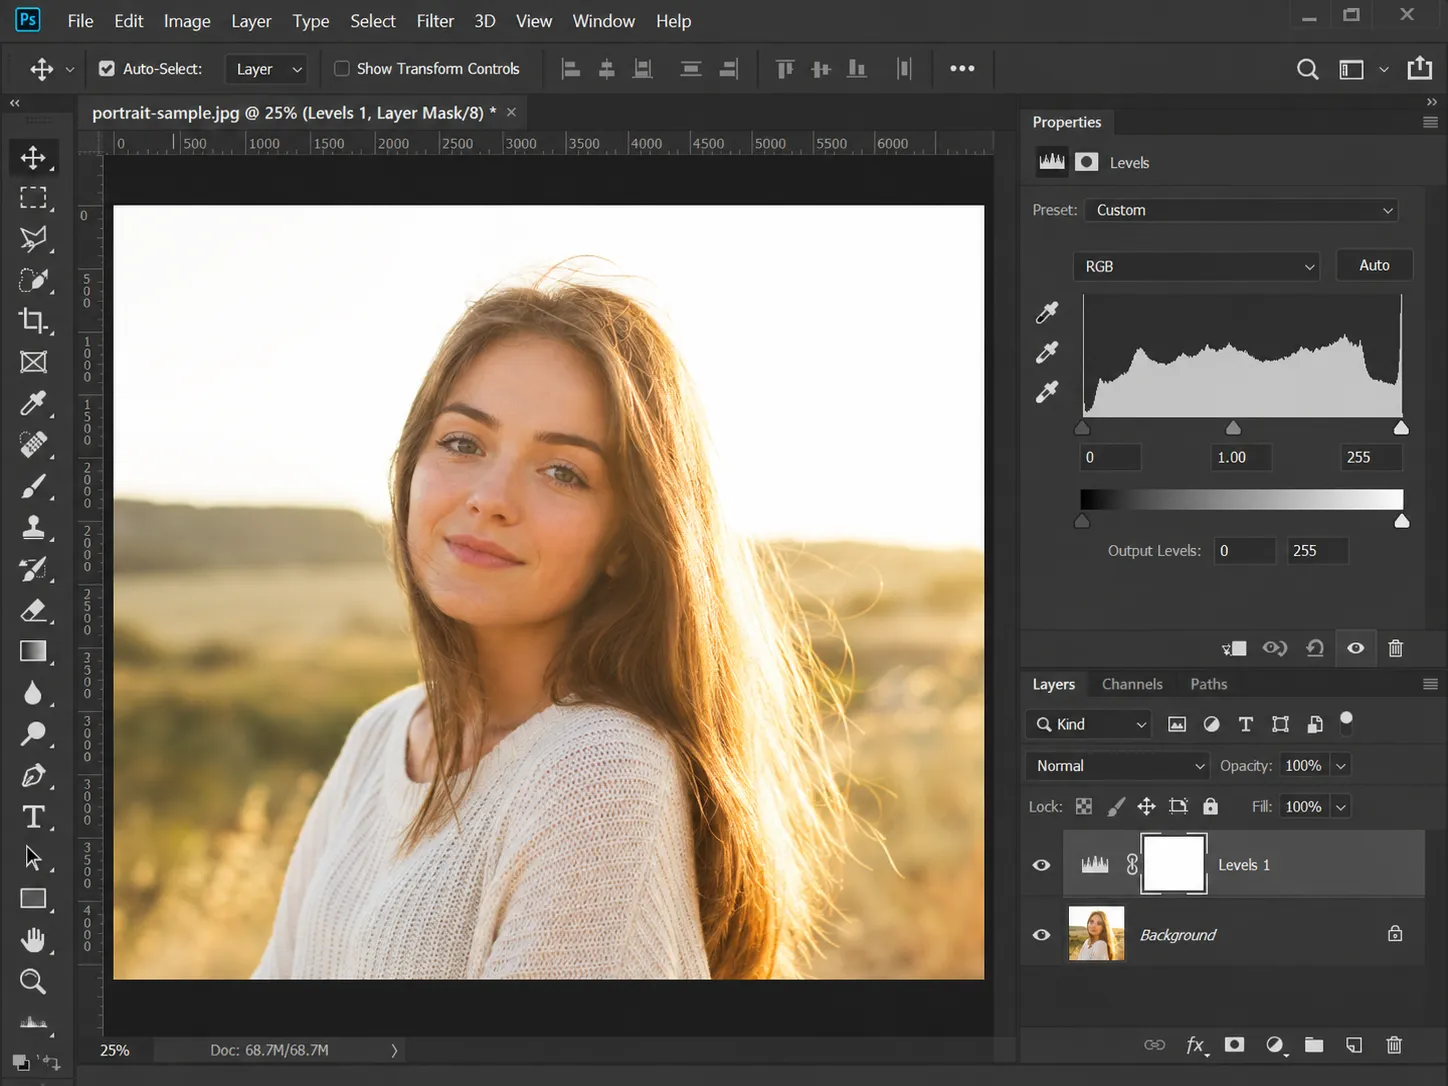
Set clean endpoints with Levels
Levels can reset the white, midtone, and black relationships after recovery. Move the middle input slider carefully to balance the frame, and use the output white slider only when the brightest values need a firm ceiling.
Do not compress the output range so far that the image loses sparkle. Use Levels as a finishing control, not a substitute for selective highlight work.
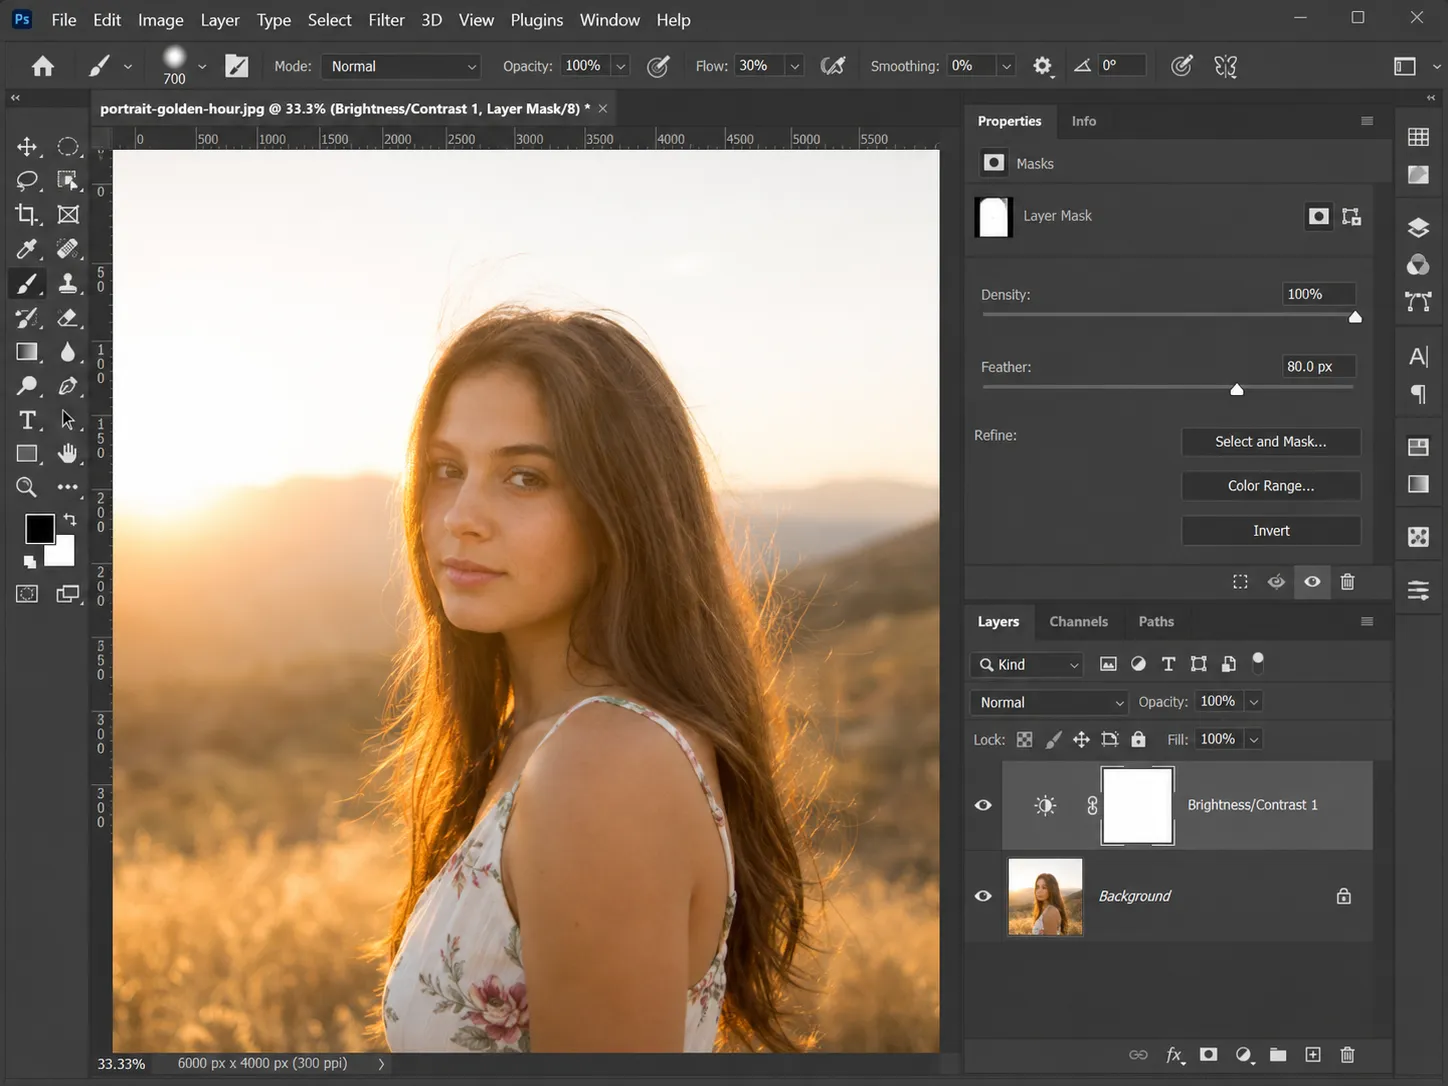
Paint the correction through a layer mask
Select the adjustment-layer mask and paint with a soft black brush where the correction should be hidden. Use a low brush opacity to build transitions gradually around faces, hair, skies, and windows.
Toggle the layer visibility and inspect the final before and after at normal viewing size and at 100 percent.
Fix a blown out sky without replacing it
For a white sky, start with a Sky selection and a Curves or Camera Raw adjustment that pulls the upper range down gently. Work only inside the selection so the foreground keeps its own exposure, and use a soft edge and a low-opacity brush to avoid a hard seam at the horizon.
If the sky has no detail at all, decide between a subtle tonal recovery and a full sky replacement. Replacement changes the scene and should be disclosed when it matters, while tonal recovery keeps the original sky but can only reduce the glare.
Frequently asked questions
Questions about how to fix overexposed photos in photoshop
Fix excessive brightness in your own photo
Upload the original image, compare the corrected exposure, and keep the version that looks natural.
Upload a Photo